E: Could not get lock /var/lib/dpkg/lock-frontend - open (11: Resource temporarily unavailable)
E: Unable to acquire the dpkg frontend lock (/var/lib/dpkg/lock-frontend), is another process using it?


 * 해결방법

$ sudo killall apt apt-get
$ sudo rm /var/lib/apt/lists/lock
$ sudo rm /var/cache/apt/archives/lock
$ sudo rm /var/lib/dpkg/lock*
$ sudo dpkg --configure -a
$ sudo apt update


'Linux' 카테고리의 다른 글

DNS Server 추가  (0) 2021.12.20
커널 메세지 출력(printk log level) 분석  (0) 2021.11.02
netplan: fatal error: cannot bind to port 2983 해결  (0) 2021.09.28
ubuntu Samba 설정  (0) 2021.07.30
ext4 mount하여 파일 확인 방법  (0) 2021.07.26


1. project 생성


2. SSH 인증 

$ ssh-keygen
$ vi .ssh/id_rsa.pub		#복사하여 gerrit web에서 계정 Setting -> SSH Keys에 넣는다.


3. Gerrit Clone & Push


$ git clone "ssh://whatmam@192.168.111.130:29418/test_repo"
$ cd test_repo
$ git add test.config
$ git commit -m "test 1"
$ git push


'browse'는 git repogitory의 모든 파일을 보여준다.

'view all'은 code-review를 할때 사용된다.


먼저 browse에 들어가보면 정상적으로 push가 된것을 볼 수있다. 

그러나 이건 code-review가 아닌 흔히 아는 git push와 동일하고 'view all'에는 아무것도 보이지 않는다.

gerrit은 code-review를 하기위해선 특정 brach로 push되어야한다. 좀 독특하다.

code-review를 위한 push를 해보자.


* Clone with commit-msg hook 로 clone하여 실행

$ git clone "ssh://whatmam@192.168.111.130:29418/test_repo" && scp -p -P 29418 whatmam@192.168.111.130:hooks/commit-msg "test_repo/.git/hooks/"
$ git config --global alias.push-for-review "push origin HEAD:refs/for/master"
$	### test.config 수정
$ git add test.config 
$ git commit -m "for code review test"
$ git push-for-review

기본적으로 Commit-Id가 있어야 push가 가능하다. 또한 push하는 brach가 "HEAD:refs/for/master"인 것을 볼 수 있다.

그래서 hooks를 이용하여 Commit-Id를 자동으로 생성하도록 하면서 push하게 쓰는데 gerrit web에서 Clone with commit-msg hook를 제공하여 한번에 받으면 된다.

좀 더 편한 push를 위해 alias 등록하여 사용하겠다.


참고 : https://www.mediawiki.org/wiki/Gerrit/Alternatives_to_git-review


이제 아래와 같이 확인하면 된다.


"REPLY" 버튼을 누르고 review하면 "submit" 버튼이 생성되어야 하는데 생기지 않는다.

Defalut가 Code-Review 2점이상 verified 1점이상 이여야 submit이 가능하다.. 근데 verified 점수주는게 보이지 않는다.


All-Projects -> Access 

Reference: refs/heads/* 에 Label Verified Administrators 추가하여 저장


이제 정상적으로 submit 버튼이 보인다.


 * Merged된 결과 화면

'Gerrit' 카테고리의 다른 글

Gerrit 계정 권한 설정  (0) 2021.12.22
Gerrit 설치  (0) 2021.12.02

<Spec>

  • Ubuntu version : ubuntu-18.04.5-desktop-amd64
  • Gerrit version : 3.4.1.war
  • JDK version : 11.X 이상
  • Database : H2 (Gerrit defalut DB)
  • Git Repository browser : Gitiles (Gerrit defalut DB) 

(참고로, gerrit-3.1.4.war 는 JDK 8.X 이상이면 된다.)


-Working path

$ pwd
/opt


1. Apache2 설치

$ sudo apt-get install apache2
$ sudo apt-get install apache2-utils
$ sudo a2enmod proxy				# 상태 확인
$ sudo a2enmod proxy_http			# 상태 확인
$ sudo service apache2 restart			#apache2 Start
$ systemctl status apache2			#apache2 상태 확인


2. Open SSH Server 설치

$ sudo apt-get install openssh-server


3. Git 설치

$ sudo apt-get install git


4. Gerrit 설치

$ sudo apt install openjdk-11-jre-headless
$ sudo wget https://gerrit-releases.storage.googleapis.com/gerrit-3.4.1.war
$ sudo java -jar gerrit-3.4.1.war init -d /opt/gerrit


[sudo] password for whatmam: 
Using secure store: com.google.gerrit.server.securestore.DefaultSecureStore
[2021-12-01 06:33:08,345] [main] INFO  com.google.gerrit.server.config.GerritServerConfigProvider : No /opt/gerrit/etc/gerrit.config; assuming defaults

*** Gerrit Code Review 3.4.1
*** 

Create '/opt/gerrit'           [Y/n]? Y

*** Git Repositories
*** 

Location of Git repositories   [git]: repositories

*** JGit Configuration
*** 

Auto-configured "receive.autogc = false" to disable auto-gc after git-receive-pack.

*** Index
*** 

Type                           [lucene]: 

*** User Authentication
*** 

Authentication method          [openid/?]: http
Get username from custom HTTP header [y/N]? y
Username HTTP header           [SM_USER]: 
SSO logout URL                 : 
Enable signed push support     [y/N]?  
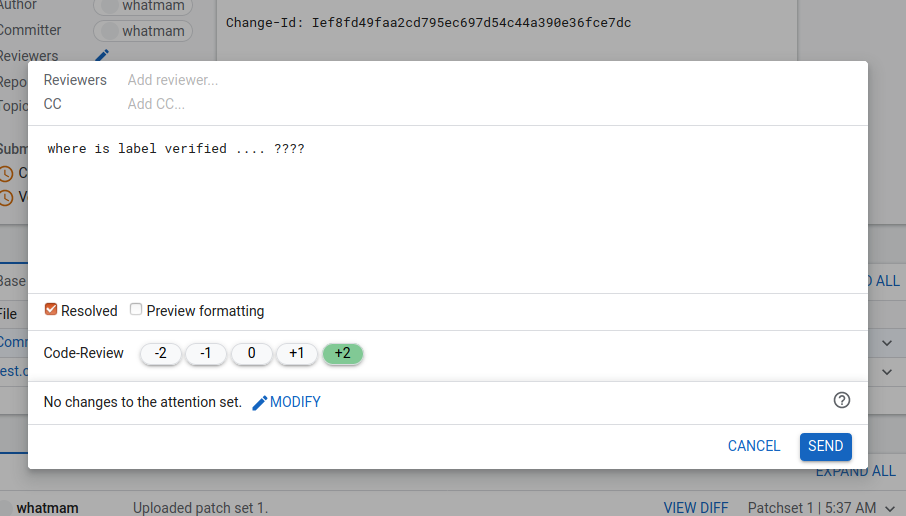
*** Review Labels
*** 

Install Verified label         [y/N]? y
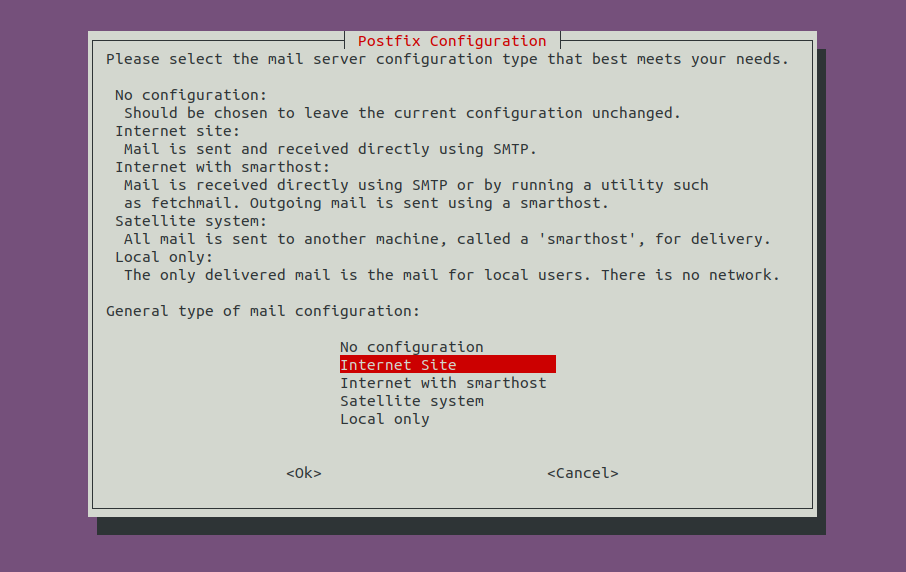
*** Email Delivery
*** 

SMTP server hostname           [localhost]: smtp.gmail.com    
SMTP server port               [(default)]: 465     
SMTP encryption                [none/?]: SSL
SMTP username                  [root]: whatmam@gmail.com
whatmam@gmail.com's password   : 
              confirm password : 

*** Container Process
*** 

Run as                         [root]: 
Java runtime                   [/usr/lib/jvm/java-11-openjdk-amd64]: 
Copy gerrit-3.4.1.war to /opt/gerrit/bin/gerrit.war [Y/n]? Y
Copying gerrit-3.4.1.war to /opt/gerrit/bin/gerrit.war

*** SSH Daemon
*** 

Listen on address              [*]: 
Listen on port                 [29418]: 
Generating SSH host key ... rsa... ed25519... ecdsa 256... ecdsa 384... ecdsa 521... done

*** HTTP Daemon
*** 

Behind reverse proxy           [y/N]? y
Proxy uses SSL (https://)      [y/N]? 
Subdirectory on proxy server   [/]: 
Listen on address              [*]: 192.168.111.130
Listen on port                 [8081]: 8989
Canonical URL                  [http://192.168.111.130/]: 

*** Cache
*** 


*** Plugins
*** 

Installing plugins.
Install plugin codemirror-editor version v3.4.1 [y/N]? y
Installed codemirror-editor v3.4.1
Install plugin commit-message-length-validator version v3.4.1 [y/N]? y
Installed commit-message-length-validator v3.4.1
Install plugin delete-project version v3.4.1 [y/N]? y
Installed delete-project v3.4.1
Install plugin download-commands version v3.4.1 [y/N]? y
Installed download-commands v3.4.1
Install plugin gitiles version v3.4.1 [y/N]? y
Installed gitiles v3.4.1
Install plugin hooks version v3.4.1 [y/N]? y
Installed hooks v3.4.1
Install plugin plugin-manager version v3.4.1 [y/N]? y
Installed plugin-manager v3.4.1
Install plugin replication version v3.4.1 [y/N]? y
Installed replication v3.4.1
Install plugin reviewnotes version v3.4.1 [y/N]? y
Installed reviewnotes v3.4.1
Install plugin singleusergroup version v3.4.1 [y/N]? y
Installed singleusergroup v3.4.1
Install plugin webhooks version v3.4.1 [y/N]? y
Installed webhooks v3.4.1
Initializing plugins.

============================================================================
Welcome to the Gerrit community

Find more information on the homepage: https://www.gerritcodereview.com
Discuss Gerrit on the mailing list: https://groups.google.com/g/repo-discuss
============================================================================
Initialized /opt/gerrit
Init complete, reindexing accounts with: reindex --site-path /opt/gerrit --threads 1 --index accountsReindexed 0 documents in accounts index in 0.0s (0.0/s)
Index accounts in version 11 is ready
Warning: InterruptedException
java.lang.InterruptedException
at java.base/java.lang.Object.wait(Native Method)
at java.base/java.lang.Thread.join(Thread.java:1308)
at org.h2.util.MathUtils.getSecureRandom(MathUtils.java:105)
at org.h2.util.MathUtils.secureRandomBytes(MathUtils.java:307)
at org.h2.store.FileLock.setUniqueId(FileLock.java:315)
at org.h2.store.FileLock.lockFile(FileLock.java:345)
at org.h2.store.FileLock.lock(FileLock.java:136)
at org.h2.engine.Database.open(Database.java:622)
at org.h2.engine.Database.openDatabase(Database.java:260)
at org.h2.engine.Database.<init>(Database.java:254)
at org.h2.engine.Engine.openSession(Engine.java:57)
at org.h2.engine.Engine.openSession(Engine.java:164)
at org.h2.engine.Engine.createSessionAndValidate(Engine.java:142)
at org.h2.engine.Engine.createSession(Engine.java:125)
at org.h2.engine.Engine.createSession(Engine.java:27)
at org.h2.engine.SessionRemote.connectEmbeddedOrServer(SessionRemote.java:331)
at org.h2.jdbc.JdbcConnection.<init>(JdbcConnection.java:107)
at org.h2.jdbc.JdbcConnection.<init>(JdbcConnection.java:91)
at org.h2.Driver.connect(Driver.java:74)
at com.google.gerrit.server.cache.h2.H2CacheImpl$SqlHandle.<init>(H2CacheImpl.java:679)
at com.google.gerrit.server.cache.h2.H2CacheImpl$SqlStore.acquire(H2CacheImpl.java:647)
at com.google.gerrit.server.cache.h2.H2CacheImpl$SqlStore.buildBloomFilter(H2CacheImpl.java:365)
at com.google.gerrit.server.cache.h2.H2CacheImpl$SqlStore.open(H2CacheImpl.java:337)
at com.google.gerrit.server.cache.h2.H2CacheImpl.start(H2CacheImpl.java:197)
at com.google.gerrit.server.logging.LoggingContextAwareRunnable.run(LoggingContextAwareRunnable.java:113)
at java.base/java.util.concurrent.ThreadPoolExecutor.runWorker(ThreadPoolExecutor.java:1128)
at java.base/java.util.concurrent.ThreadPoolExecutor$Worker.run(ThreadPoolExecutor.java:628)
at java.base/java.lang.Thread.run(Thread.java:829)
Collecting projects:    2 changes with: reindex --site-path /opt/gerrit --threads 1 --index changes
Reindexing changes: project-slices: 100% (2/2), done    
Reindexed 0 documents in changes index in 0.0s (0.0/s)
Index changes in version 61 is ready
Reindexing groups:      100% (2/2)ith: reindex --site-path /opt/gerrit --threads 1 --index groups
Reindexed 2 documents in groups index in 0.2s (11.4/s)
Index groups in version 8 is ready
Reindexing projects:    100% (2/2) with: reindex --site-path /opt/gerrit --threads 1 --index projects
Reindexed 2 documents in projects index in 0.1s (14.5/s)
Index projects in version 4 is ready
Executing /opt/gerrit/bin/gerrit.sh start
Starting Gerrit Code Review: OK
Waiting for server on 192.168.111.130:80 ... OK
Opening http://192.168.111.130/#/admin/projects/ ...Gtk-Message: 06:47:49.754: Failed to load module "canberra-gtk-module"
OK

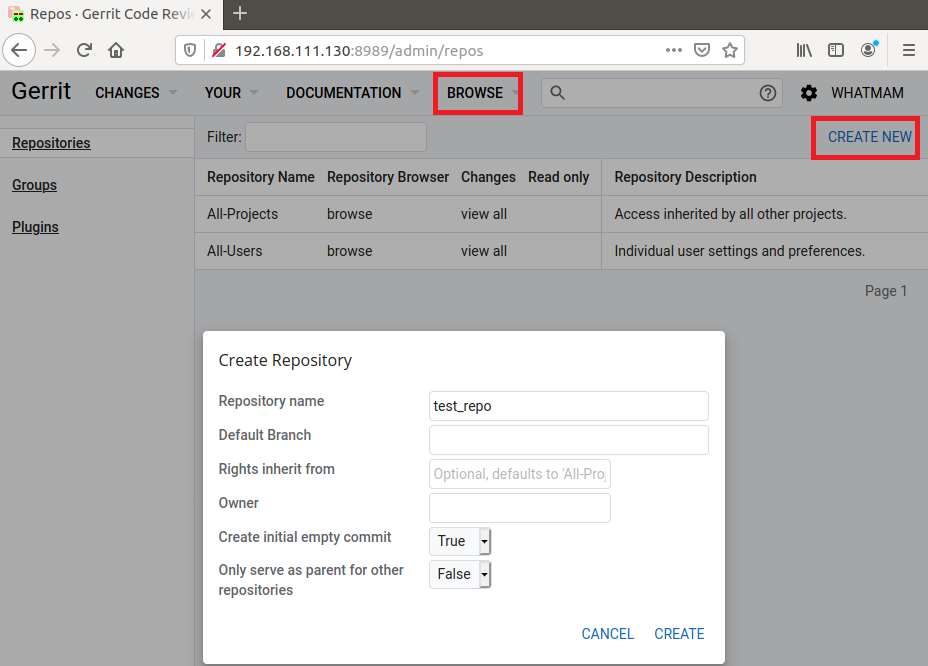
후에 다시 수정해서 사용하기에 기본적으로 Setting 해준다. plugin은 무지성 깔아보려한다.


5. Gerrit 계정 추가

$ sudo htpasswd -c /opt/gerrit/etc/passwords "whatmam"
$		### 	추가로 계정 추가시 -c option 제거

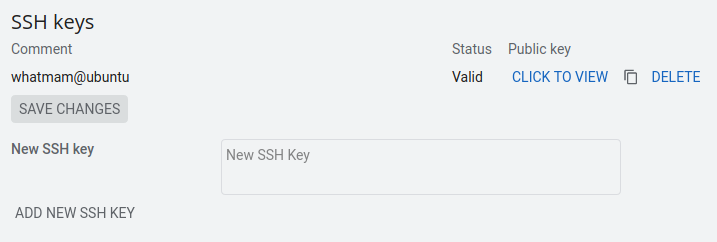
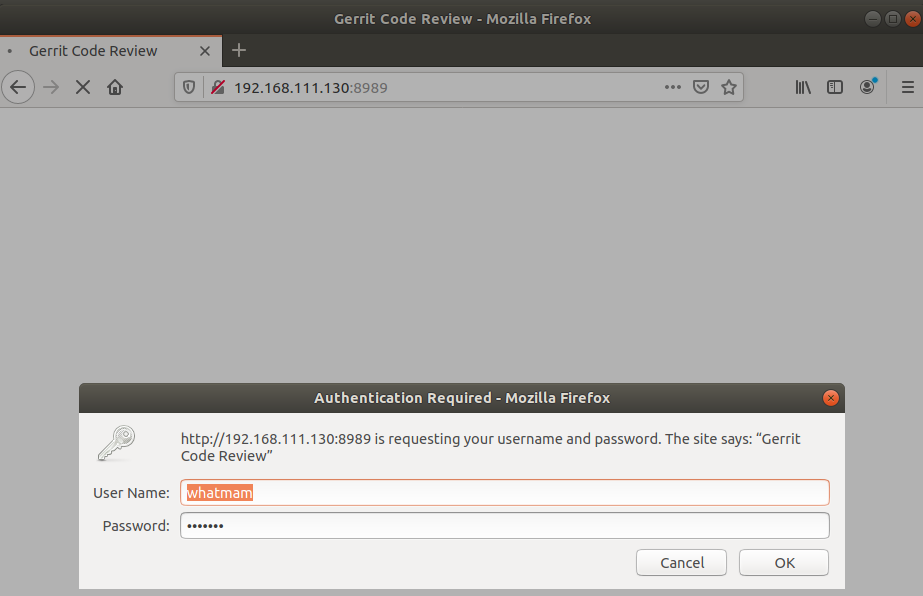
htpasswd로 생성하는 계정은 apache에서 인증을 위해 사용하는 계정이며, gerrit은 처음 생성된 계정(uid 1000000)을 administrator로 인식한다.
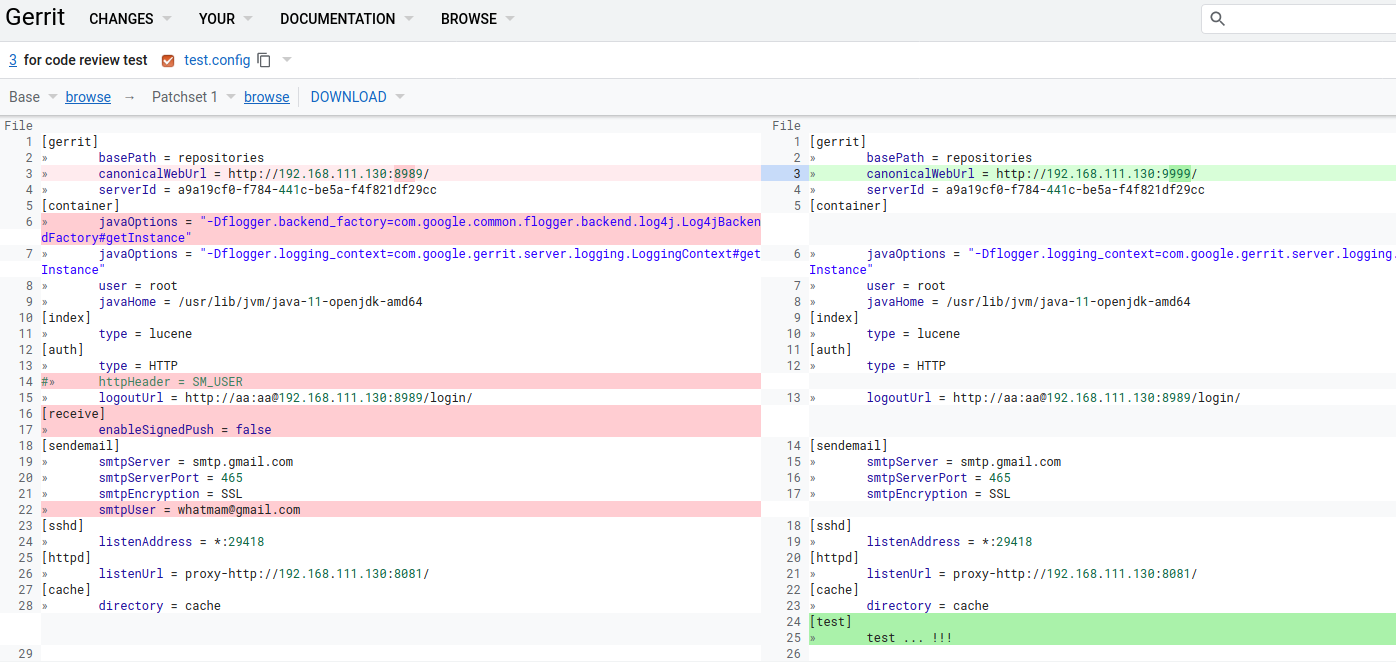
 

* Port number 

Gerrit port : 8989

apache port : 8081

6. Apache VirtualHost File 생성

$ sudo vi /etc/apache2/sites-available/001-whatmam.conf 


<VirtualHost *:8989>						### Gerrit Port 		
        ServerName 192.168.111.130				### Gerrit address
       
        ProxyRequests Off
        ProxyVia Off
        ProxyPreserveHost On

        <Proxy *>
                Order deny,allow
                Allow from all		
        </Proxy>

        <Location /login/>
                AuthType Basic
                AuthName "Gerrit Code Review"
                Require valid-user
                AuthUserFile /opt/gerrit/etc/passwords		### Gerrit passwords path 지정
        </Location>

        AllowEncodedSlashes On
        ProxyPass / http://192.168.111.130:8081/ nocanon	### nocanon option 필수
        ProxyPassReverse / http://192.168.111.130:8081/
</VirtualHost>


7. Apache site-enabled 활성화

$ cd /etc/apache2/sites-enabled/
$ sudo ln -s ../sites-available/001-whatmam.conf ./001-whatmam.conf
$ sudo a2ensite 001-whatmam.conf
$	### a2ensite는 sites-available에 있는 Setting 활성화 (00X- 의 형식을지켜야함)
$	### Linking되어 있으면 굳이 쓸필요 없다.


8. Apache port 설정

$ sudo vi /etc/apache2/ports.conf


# If you just change the port or add more ports here, you will likely also
# have to change the VirtualHost statement in
# /etc/apache2/sites-enabled/000-default.conf

# If you just change the port or add more ports here, you will likely also
# have to change the VirtualHost statement in
# /etc/apache2/sites-enabled/000-default.conf

NameVirtualHost *:8989			### Gerrit port 추가
Listen 8989

<IfModule ssl_module>
        Listen 443
</IfModule>

<IfModule mod_gnutls.c>
        Listen 443
</IfModule>

# vim: syntax=apache ts=4 sw=4 sts=4 sr noet


9. Gerrit Configure file 수정

$ vi /opt/gerrit/etc/gerrit.config


[gerrit]
        basePath = repositories
        canonicalWebUrl = http://192.168.111.130:8989/				### Gerrit URL & port
        serverId = a9a19cf0-f784-441c-be5a-f4f821df29cc
[container]
        javaOptions = "-Dflogger.backend_factory=com.google.common.flogger.backend.log4j.Log4jBackendFactory#getInstance"
        javaOptions = "-Dflogger.logging_context=com.google.gerrit.server.logging.LoggingContext#getInstance"
        user = root
        javaHome = /usr/lib/jvm/java-11-openjdk-amd64
[index]
        type = lucene
[auth]
        type = HTTP
#       httpHeader = SM_USER
        logoutUrl = http://aa:aa@192.168.111.130:8989/login/		###  http특성으로 인한 Gerrit 버그 해결
[receive]
        enableSignedPush = false
[sendemail]
        smtpServer = smtp.gmail.com
        smtpServerPort = 465
        smtpEncryption = SSL
        smtpUser = whatmam@gmail.com
[sshd]
        listenAddress = *:29418
[httpd]
        listenUrl = proxy-http://192.168.111.130:8081/				### Apache port
[cache]
        directory = cache

logoutUrl에 'aa:aa' 부분이 빠지면 로그아웃이 되지않는 현상이 발생함. 'aa'라는 계정으로 login page접근하겠다는 의미로 로그아웃을 시켜버림.


10. Apache & gerrit restart

$ sudo service apache2 restart
$ sudo /opt/gerrit/bin/gerrit.sh restart


11. Gerrit 접속

"http://192.168.111.130:8989/" 로 접속해보겠다.


접속이 완료 되었다. 이것저것 둘러보고

다음에는

 - Repogitory 생성 및 clone push 

 - 계정 새성 및 권한 지정

 - 코드 리뷰를 위한 push 


알아보도록 하자!

'Gerrit' 카테고리의 다른 글

Gerrit 계정 권한 설정  (0) 2021.12.22
Gerrit Porject 생성 및 Push  (1) 2021.12.05

먼저 gitlab 사이트에 친절하게 알려준다. 그대로 실행하면 된다.


https://about.gitlab.com/install/


Download and install GitLab

Learn about the various GitLab installation packages and downloads for Ubuntu, Debian, Docker, Google Cloud, and many more.

about.gitlab.com

1. Gitlab 설치

$ sudo apt-get update
$ sudo apt-get install -y curl openssh-server ca-certificates tzdata perl
$ sudo apt-get install -y postfix

$ curl https://packages.gitlab.com/install/repositories/gitlab/gitlab-ee/script.deb.sh | sudo bash


$ sudo apt-get install gitlab-ee


 * 설치 중 error 나면서 gitlab-ctl reconfigure 을 하라고 한다. 이유는 모르겟으나 시키는대로한다.

$ sudo gitlab-ctl reconfigure
$ sudo apt-get install gitlab-ee


2. Gitlab 설정

1.external.url 수정

$ vi /etc/gitlab/gitlab.rb
 external_url 'http://127.0.0.1:8888'

 * 웹에 http://127.0.0.1:8888로 접속하여 확인한다.


2. root 비밀번호 수정

초기 비밀번호는 /etc/gitlab/initial_root_password에 있음 로그인 후 비밀번호 변경하여 사용 

ID : root

Password: SCqxIYUAtUQzsiB29a49nVoj9w0peh4E59HgC5//83o=


또는 다음과 같이 설정

$ sudo gitlab-rails console -e production
=> user = User.where(id:1).first
=> user.password='test1234'
=> user.password_confirmation='test1234'
=> user.save
=> exit


2. Gitlab Version 확인

$ sudo gitlab-rake gitlab:env:info


gitlab apt install error solved


https://forum.gitlab.com/t/solved-error-gitlab-ce-8-12-3-ce-0-amd64-deb-gitlab-ce-8-13-1-ce-0-amd64-deb/4883


<Spec>

  • target Board : i.MX6DL
  • Ubuntu : ubuntu-18.04.5-desktop-amd64


1. Yocto 설치 및 build

$ git clone git://code.qt.io/yocto/meta-boot2qt
$ cd meta-boot2qt
$ git checkout tags/v5.12.3
$ ./b2qt-init-build-env init --device imx6qdlsabresd
$ vi meta-boot2qt-distro/recipes-core/packagegroups/packagegroup-b2qt-embedded-base.bb
$ 	ttf-opensans와 otf-noto를 제거 (제거하지 않으면 build error 발생)
$ export MACHINE=imx6qdlsabresd
$ source ./setup-environment.sh
$ bitbake b2qt-embedded-qt5-image

먼저 QT5.12.3 Version으로 boot2qt 빌드를 하였다. build가 완료 되면 Filesystem image만 사용할 예정이다.


 * Output Filesystem Image Path

meta-boot2qt/build-imx6qdlsabresd/tmp/deploy/images/imx6qdlsabresd/b2qt-embedded-qt5-image-imx6qdlsabresd-20211109054636.rootfs.ext3


2. GPU Driver부분만 변경하여 Yocto Build

현재 GPU Drive Version이 6.2.4p.1.2 로 설정되어 있는데 6.2.4.p4.0로 변경해 보겠다.

최소한의 필요한 부분을 수정하여 빌드하는것이 목적이다.


1.  Configure 설정

$ vi meta-boot2qt-distro/conf/distro/include/imx6qdlsabresd.conf
+ PREFERRED_VERSION_imx-gpu-viv = "6.2.4.p4.0-aarch32"
+ PREFERRED_VERSION_kernel-module-imx-gpu-viv = "6.2.4.p4.0"
+ PREFERRED_VERSION_imx-gpu-g2d = "6.2.4.p4.0"


 2. meta-freescale 수정

1. https://git.yoctoproject.org/
2. meta-freescale 선택
3. tree 목록 -> recipes-graphics
4. log 목록 선택
5. 2019-09-21 weston-init: Adjust to match recent oe-core changes Khem Raj 2

( meta-freescale-b61675eccc5ac3cf73f9e24bc651a08ab37110de.tar.bz2 )
6. commit 목록을 들어가면 file을 donwload 받을 수 있다. download 받고 압축풀고 recipes-graphics 부분만 update해준다.

$ cp -rfvp meta-freescale-b61675eccc5ac3cf73f9e24bc651a08ab37110de/recipes-graphics meta-boot2qt/sources/meta-freescale/recipes-graphics
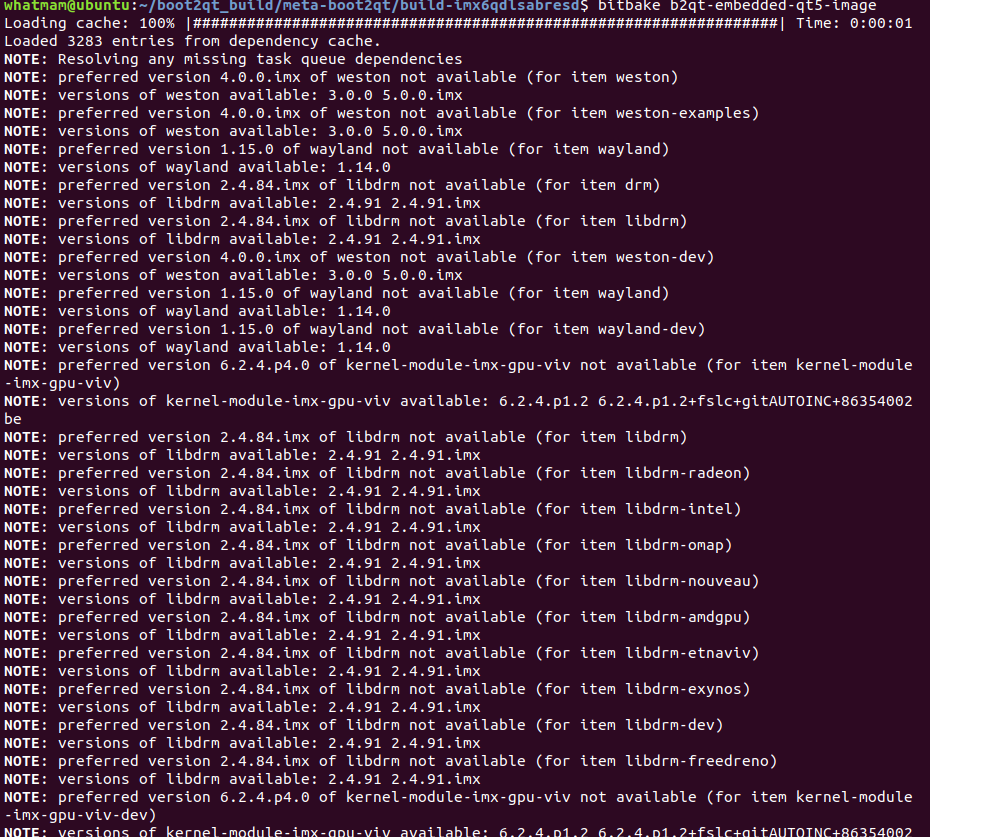
$ 			## GPU Version 확인
$ ls meta-boot2qt/sources/meta-freescale/recipes-graphics/imx-gpu-g2d
$ ls meta-boot2qt/sources/meta-freescale/recipes-graphics/imx-gpu-viv


 3. vi sources/poky/meta/recipes-graphics/wayland/weston_3.0.0.bb 수정

36번째 줄 'kms' 제거


 4. build

$ export MACHINE=imx6qdlsabresd
$ source ./setup-environment.sh
$ bitbake b2qt-embedded-qt5-image

build하면 다음과 같은 message가 나오지만 빌드가 완료된다.


 5. build 확인

# ls build-imx6qdlsabresd/tmp/work/cortexa9hf-neon-mx6qdl-poky-linux-gnueabi/imx-gpu-viv/1_6.2.4.p4.0-aarch32-r0


 6. Filesystem ouput

 - Filesystem Image 위치

# ls build-imx6qdlsabresd/tmp/deploy/images/imx6qdlsabresd/b2qt-embedded-qt5-image-imx6qdlsabresd-20211116063046.rootfs.ext3


유용한 bitbake 명령어


# bitbake-layers show-layers

# bitbake-layers show-overlayed

# bitbake-layers show-appends


 사용될 kernel version이 4.19이기에 4.9 -> 4.19로 마춰주려고 하였지만 실제 build에서 skip되어 영향이 없는 부분이다.

$ vi meta-boot2qt/sources/meta-freescale-3rdparty/recipes-kernel/linux/linux-boundary_4.19.x.bb

# Adapted from linux-imx.inc, copyright (C) 2013, 2014 O.S. Systems Software LTDA
# Released under the MIT license (see COPYING.MIT for the terms)

require recipes-kernel/linux/linux-imx.inc

SUMMARY = "Linux kernel for Boundary Devices boards"

SRC_URI = "git://github.com/boundarydevices/linux-imx6.git;branch=${SRCBRANCH} \
           file://defconfig \
"

LOCALVERSION = "-1.1.0-ga+yocto"
SRCBRANCH = "boundary-imx_4.19.x_1.1.0"
SRCREV = "ac107ccf4dcb6a1c4e90d794ed3b3f44d4859868"
DEPENDS += "lzop-native bc-native"
COMPATIBLE_MACHINE = "(nitrogen6x|nitrogen6x-lite|nitrogen6sx|nitrogen7)"

* yocto에서 kernel version 4.9 -> 4.19 실제로 kernel 전체를 4.9에서 4.19로 바꾸는게 아니고 boundery부분만 바꿔서(참고하는 kernel) 빌드 되도록 한다.
1. git://github.com/boundarydevices/linux-imx6
2. github branch를 kernel 4.19 선택 후 commit hash값 확인해서 넣는다.

1. Git Repository 그대로 옮기기

A : 이동할 원본 Repogitory

B : 새로 만든 이동될 Repogitory

$ git clone --mirror ${A Repogitory URl}.git
$		### EX) git clone --mirror http://192.168.1.11:9988/test/test.git
$ cd ${A Repogitory name}
$ git remote set-url --push origin ${B Repogitory URL}.git
$ git push --mirror


proxy error 발생 시


$ git config --global --unset http.proxy
$ git config --global http.sslVerify false


2. 여러개의 Git Repository를 하나로 통합 방법

A, B : 원본 Repogitory 

M : 새로 만든 이동될 Repogitory

$ git clone ${M Repogitory URl}
$ cd ${M Repogitory name}
$ git remote add ${brach_name} ${A Repogitory URl}
$		### EX) git remote add repo_A http://192.168.1.11:9988/test/test.git
$ git fetch ${brach_name}
$ git merge --allow-unrelated-histories ${brach_name}/master
$ git push


$ git remote add ${brach_name} ${B Repogitory URl}
$		### EX) git remote add repo_B http://192.168.1.11:9988/test/test.git
$ git fetch ${brach_name}
$ git merge --allow-unrelated-histories ${brach_name}/master
$ git push

계속해서 merge하면서 통합을 진행 하면 된다.


 * tags push

$ git push --tags
$ git push --all	#branch push


3. gitlab에서 data repogitories에서 Push Test


https://www.lesstif.com/gitbook/github-default-master-main-100205686.html


github default 브랜치명을 master 에서 main 으로 변경하기

local 에 저장소를 clone 한 경우 다음과 같이 기본 저장소 이름을 바꿔줘야 합니다. git branch -m master main git fetch origin git branch -u origin/main main BASH

www.lesstif.com

$ git remote -v			# 확인
$ git remote remove ${branch}	# remove
$ git remote add master {Repogitory URL}
$ git fetch master
$ git push --set-upstream master master --force
$ git push --tags


'Git' 카테고리의 다른 글

Git commit push 내용 변경  (0) 2022.04.29
유용한 Git 명령어 정리  (0) 2021.11.02

■ 초기 Setting
git clone https://github.com/Whatmam/InCu6Q.git
git add Filesystem
git commit -m "ADD QT5"
git branch -M main
git push -u origin main


■ 리모트 저장소 확인하기
git remote -v

■ Branch 이동
git checkout (branch name)
git checkout develop            -> develop해서 사용하고 commit.. 후 master에게 merge 요청하여 사용이 좋음
git branch ->현재 branch 확인


※ repository의 branch , git clone에서 생성한 branch는 다르다. working repo -> remote repo로 적용시켜야함.


참고:  https://goddaehee.tistory.com/274

 - branch 생성
git branch test
 - branch로 이동
git checkout test
 - branch 생성 + 이동
git branch -b test
 - 생성한 Branch를 원격 Repository에 push 하기
git push --set-upstream origin test


■ Update
git pull ->현재 branch의 최신 업데이트
git pull origin (branch name) -> branch에 대한 업데이트


■ 수정 사항 확인 하기
git diff

■ push한 message 수정
1. git commit --amend
2. 수정
3. git push --force

■push 취소
git reset [체크섬]
git commit 
git push orign main -f (강제 push)

■push전 commit 돌리기
git log로 commit 체크섬 확인
git reset [체크섬]

■git tag로 download 
1. git clone -b upstream/6.2.4.p4.0 https://github.com/Freescale/kernel-module-imx-gpu-viv.git

2. git clone https://github.com/Freescale/kernel-module-imx-gpu-viv.git
git checkout upstream/6.2.4.p4.0

X git pull https://github.com/Freescale/kernel-module-imx-gpu-viv.git upstream/6.2.4.p4.0 이건 아님 최신에서 pull 하기에 이미 적용되어 있어서 안됨.

3. git clone https://github.com/Freescale/kernel-module-imx-gpu-viv.git
git reset --hard upstream/6.2.4.p4.0 reset으로 간다.


■ git tag

 - 테그 생성
git tag v1.0.0
git tag
git show v1.0.0

 - 원격 저장소의 테그 올리기
git push origin v1.0.0

 - 원격 저장소의 테그 삭제
git push origin :v1.0.0


■ project 히스토리까지 모두 복사하는 방법
git clone --mirror  git clone https://chs0517@106.251.230.25:28443/r/apps/test.git
cd sw_cowork.git/
git remote set-url --push origin http://106.251.230.24:9988/whatmam/test.git
git push --mirror 


■ error 시 

git config --global --unset http.proxy
git config --global http.sslVerify false


 -- git reset 하는법

https://sehajyang.github.io/tip/2019/03/11/git-reset-push.html/

'Git' 카테고리의 다른 글

Git commit push 내용 변경  (0) 2022.04.29
Git repository 옮기기 및 통합 Git repository (history 유지)  (0) 2021.11.08

1. Log Level 의미


항목 레벨 설명
1 Console Log Level 이 값보다 높은 우선순위 메세지(숫자가 작은..)들을 콘솔에 출력
2 Default Message Log Level 우선순위 없는 메시지들의 Level Default 값.
ex) printk함수를 사용하면서 별도의 로그레벨을 설정하지 않을 경우
     default로 입력되는 레벨.
3 Minimum Console Log Level Console Log Level 이 설정될 수 있는 최소값. 
Console Log Level >= Minimum Console Log Level
4 Default Console Log Level Console Log Level Default 값

주로 Console Log Level이 핵심. 


로그 레벨 DEFINE  의미 
"<0>"  KERN_EMERG 시스템이 동작하지 않음
"<1>" KERN_ALERT 즉시 출력 메시지
"<2>" KERN_CRIT 치명적 에러 메시지
"<3>" KERN_ERR  에러 메시지
"<4>" KERN_WARNING 경고 메시지
"<5>" KERN_NOTICE 정상 메시지
"<6>" KERN_INFO 시스템 정보 메시지
"<7>" KERN_DEBUG 디버깅 정보

적절하게 사용하면 디버깅이라든지 Error 발생시 중요한 정보 등 편하게 표시하면서 개발할 수 있다.


2. Log Level 확인 및 적용

  1. /proc 확인

# cat /proc/sys/kernel/printk
4	7	1	7
# echo '1 1 1 1' > /proc/sys/kernel/printk
# cat /proc/sys/kernel/printk
1	1	1	1


  2. sysctl.conf 확인

# vi /etc/sysctl.conf
kernel.printk = 4 7 1 7		### 수정


  3. uboot bootargs 옵션 확인

> setenv bootargs ${bootargs} loglevel=4
>	### loglevel을 지정.
> setenv bootargs ${bootargs} quiet
>	### quiet 옵션이 있으면 debug message를 띄우지 않는다. 제거해야 한다.
> setenv bootargs ${bootargs} earlyprintk
>	### earlyprintk 옵션도 생각해보자.


기본적으로 Target Board의 Debug Serial pinmuxing이 되어야 하고, uboot에서 먼저 Setting값을 확인하여야 한다.

kernel, filesystem에서 아무리 변경해도 적용되지 않으면 uboot쪽을 봐야한다.

그리고 kernel에서 make menuconfig ( defconfig file 수정) -> Kernel hacking -> printk and dmesg options도 함께 보아야한다.

+ Recent posts